Setting Up a Linux Server
A clear step-by-step guide, demystifying the Linux installation process. Whether you're a seasoned sysadmin or a newbie to server management, this post will help you unlock the potential of Linux, empowering your server for a wide range of applications.
9/15/20239 min read
Introduction:
In the realm of server management, choosing the right operating system is akin to selecting the foundation for your digital castle. It's a decision that can significantly impact the performance, security, and versatility of your server. Among the multitude of options, one stands out as a paragon of reliability, security, and flexibility - Linux.
Welcome to our comprehensive guide on installing Linux on your server. Whether you're a seasoned sysadmin looking to explore the endless possibilities of Linux or a newcomer to the world of server administration, this blog post is your gateway to unleashing the power of this open-source operating system.
In this guide, we will walk you through the entire process of installing Linux on your server, from understanding why Linux is the ideal choice for server environments to configuring your system for your specific needs. By the end of this journey, you'll have the knowledge and confidence to embark on your own Linux server installation, opening doors to a myriad of applications and the freedom to craft your digital kingdom according to your vision.
Join us as we demystify the Linux installation process, demystify the world of server management, and set the stage for a secure, efficient, and tailored server environment. Let's dive into the world of Linux and embark on this exciting journey together.
Why Choose Linux for your Server:
Selecting the right operating system for your server is a pivotal decision, and understanding why Linux is often the preferred choice is crucial. In this section, we will explore the numerous compelling reasons for choosing Linux as your server's operating system.
A. Advantages of Using Linux on a Server
Reliability: Linux is renowned for its stability and reliability. It has a robust architecture that allows servers to run continuously without frequent reboots, ensuring uninterrupted service.
Security: Linux benefits from a strong security model, with regular updates and a vigilant community. Vulnerabilities are quickly addressed, making it a secure choice for your server.
Cost-Effectiveness: Linux is open-source, which means you can install and use it on your server without incurring licensing fees. This cost-effectiveness is especially attractive for small businesses and individuals.
Customizability: Linux is highly customizable, allowing you to tailor your server's environment to your specific needs. You have full control over installed software, services, and configurations.
Performance: Linux is known for its efficiency, making it an excellent choice for resource-intensive tasks. It can make the most of your server's hardware, ensuring optimal performance.
B. Comparing Linux to Other Operating Systems for Servers
Linux vs. Windows: Compare the strengths and weaknesses of Linux and Windows as server operating systems. Discuss scenarios where each excels.
Linux vs. Other Linux Distributions: Highlight the differences between popular Linux distributions suitable for servers, such as Ubuntu Server, CentOS, and Debian. Explain how to select the best fit for your needs.
C. Real-World Use Cases for Linux Servers
Web Hosting: Explain how Linux is a dominant force in the web hosting industry, powering millions of websites and web applications.
Data Centers and Cloud Services: Discuss Linux's prevalence in data centers and cloud services, providing a stable and scalable platform for hosting resources.
Development Environments: Linux is a favorite among developers for its vast array of development tools and customizable environments.
Security and Networking: Explore how Linux is the foundation of many security appliances, routers, and networking devices, emphasizing its versatility.
By the end of this section, you will have a clear understanding of why Linux is a preferred choice for server environments and how it can empower your server with reliability, security, and performance. This knowledge will lay the groundwork for the subsequent steps in installing Linux on your server.
Preparing Installation:
Before you embark on the journey of installing Linux on your server, it's essential to make adequate preparations to ensure a smooth and successful process. This section will guide you through the crucial preparatory steps.
A. Hardware Requirements and Compatibility Considerations
Server Specifications: Begin by understanding the hardware requirements of the Linux distribution you plan to install. This includes minimum CPU, RAM, and storage recommendations.
Server Compatibility: Ensure that your server's hardware components are compatible with your chosen Linux distribution. Check for compatibility lists or forums related to your server's model.
Server Backups: Before initiating any changes, create backups of your existing data and configurations. While we'll strive to avoid data loss during the installation, having a backup is a vital safety net.
B. Downloading the Linux Distribution
Selecting the Right Distribution: Revisit your choice of Linux distribution, considering factors like long-term support (LTS) versions, your familiarity with the distribution, and the requirements of your intended use.
Downloading the ISO Image: Visit the official website of your chosen Linux distribution and download the ISO image. Make sure to select the appropriate version for your server's architecture (e.g., 64-bit or ARM).
C. Creating a Bootable USB
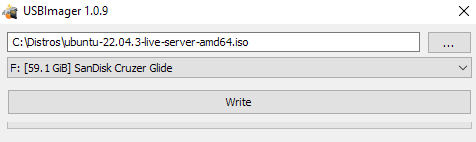
USBImager: You will need a piece of software to write the Linux ISO file to a USB in order to install it on your server, I recommend USBImager as it is a free open source tool that accomplishes this task. It can be downloaded here
To use the USBImager you start the application
Insert your USB drive
Browse to where your Linux ISO is located
Select the USB drive
Click Write and your Drive is ready to be used to install Linux onto your Server
Choosing the Right Linux Distro:
Once you've made the necessary preparations, the next crucial step in installing Linux on your server is choosing the right distribution. Linux offers a diverse range of distributions, each tailored to specific needs and preferences. In this section, we'll explore the factors you should consider when making this critical decision.
A. Overview of Popular Linux Distributions Suitable for Servers
Ubuntu Server: Discuss the strengths of Ubuntu Server, emphasizing its user-friendly approach, regular updates, and extensive community support. Mention its LTS releases for long-term stability.
CentOS: Explain why CentOS is favored for its stability and compatibility with Red Hat Enterprise Linux. Discuss its suitability for enterprise environments.
Debian: Highlight Debian's commitment to free and open-source software and its long history of stability and reliability.
Other Distributions: Mention other distributions like Fedora Server, openSUSE, and Arch Linux, and their specific use cases.
B. Selection Criteria for Your Server's Needs
Long-Term Support (LTS) vs. Rolling Release: Explain the difference between LTS and rolling release distributions and help readers decide which suits their server's requirements best.
Community Support: Emphasize the importance of community support and available documentation when choosing a distribution, as it can be a valuable resource for troubleshooting.
Package Availability: Discuss the availability of software packages and repositories for each distribution. Consider the requirements of your intended server applications.
C. Highlighting Differences Between Distributions
Package Management: Explain the package management systems used by different distributions (e.g., apt for Debian-based distributions, yum/dnf for CentOS, and zypper for openSUSE).
Configuration Tools: Mention the configuration tools and management utilities specific to each distribution that may simplify server administration.
Philosophy and Goals: Briefly touch on the philosophical differences between distributions, such as Debian's commitment to free software or CentOS's stability focus.
Installation Process:
With your preparations in place and the right Linux distribution selected, it's time to move on to the installation process itself. This section will guide you through the step-by-step installation of Linux on your server, ensuring a smooth and successful deployment.
A. Step-by-Step Guide to the Installation Process
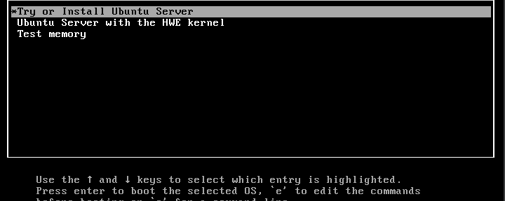
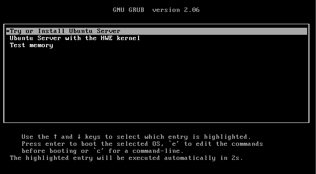
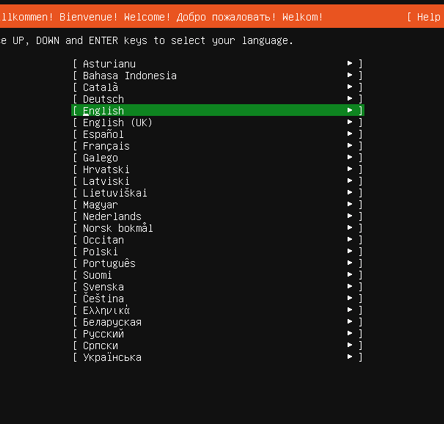
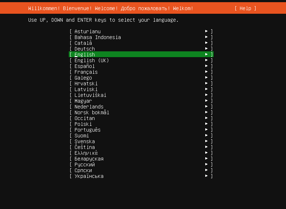
Boot from Installation USB: Begin by booting your server from the bootable USB
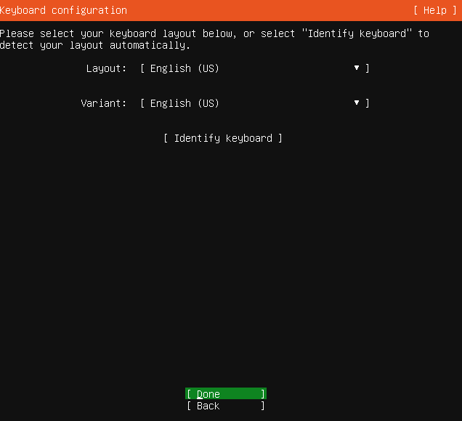
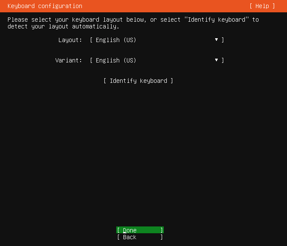
Language and Keyboard Selection: Choose your preferred language and keyboard layout to ensure a comfortable installation experience.
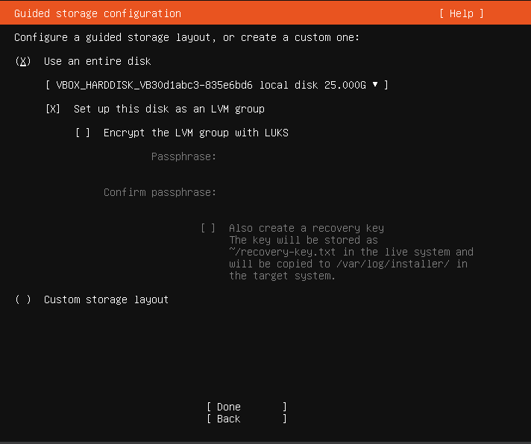
Disk Partitioning: This step is crucial. Discuss partitioning options, including guided and manual setups. Highlight best practices for partitioning, such as creating separate partitions for the root directory (/), /home, and swap space.
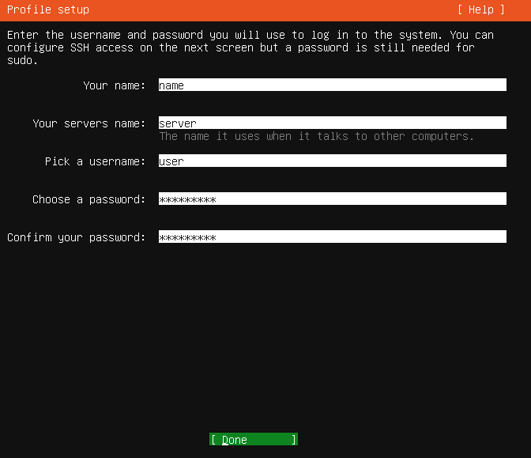
User Account: Create a user account and set a strong password. This user will have administrative privileges (sudo access).
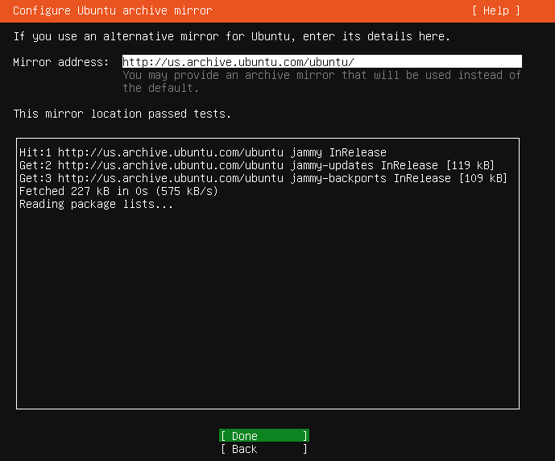
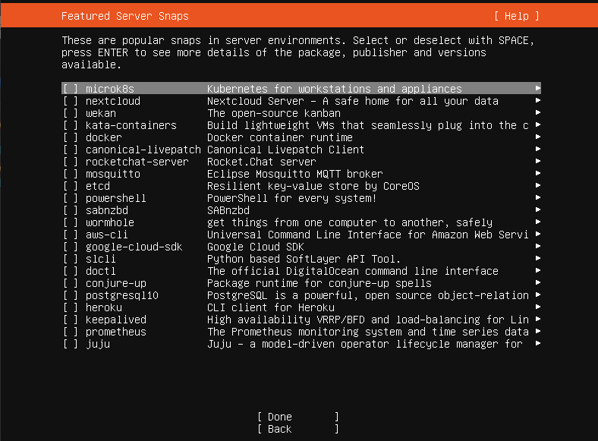
Select Software: Depending on your distribution, you may have the option to select server-specific software packages or use a minimal installation for customization.
Installation and Configuration: The Linux installation process will proceed, copying necessary files to your server's storage. Configure the bootloader (usually GRUB) to ensure the server boots into Linux.
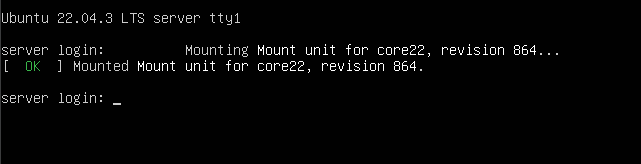
Complete Installation: Once the installation is complete, you'll receive a prompt to remove the installation medium and reboot your server.
Additional Configuration:
With Linux successfully installed and post-installation tasks completed, you're ready to further tailor your server to meet your specific needs. In this section, we will explore additional configuration steps to maximize your server's functionality and optimize its performance.
A. Setting Up Server Applications
Web Server: Discuss the installation and configuration of a web server, such as Apache or Nginx, for hosting websites or web applications. Explain virtual hosts for serving multiple websites.
Database Server: Guide users through setting up a database server, such as MySQL or PostgreSQL, for storing and managing data. Explain user and database creation.
File Server (Samba, NFS): Introduce the concept of file servers and explain how to configure file sharing services like Samba for Windows file sharing or NFS for Unix-like systems.
Email Server: Cover the basics of configuring an email server for sending and receiving emails using software like Postfix and Dovecot.
Content Management System (CMS): Explain how to install a CMS like WordPress or Joomla for website management and content publishing.
B. Server Virtualization and Containers
Virtualization: Discuss the benefits of server virtualization using tools like KVM or VirtualBox, allowing you to run multiple virtual machines on a single physical server.
Docker and Containers: Introduce containerization with Docker, explaining how it can simplify application deployment and management.
C. System Monitoring and Management Tools
Nagios and Zabbix: Present server monitoring tools like Nagios and Zabbix, which help you track system performance, detect issues, and ensure system reliability.
System Logs: Explain the importance of system logs and how to review and analyze them for troubleshooting and system performance analysis.
D. Version Control System (Git)*
Git Installation: Walk users through the installation and basic setup of Git, which is crucial for managing code, scripts, and configuration files.
Git Repositories: Explain how to create Git repositories to track changes and collaborate on server configurations.
E. Automated Backups and Data Recovery*
Backup Strategies: Discuss various backup strategies, including full backups, incremental backups, and snapshot-based backups.
Data Recovery: Guide users on how to restore data from backups in the event of data loss or system failures.
F. Scalability and Load Balancing
Scaling Resources: Explain how to scale server resources by adding more RAM, CPU cores, or storage to meet growing demands.
Load Balancing: Introduce the concept of load balancing to distribute incoming network traffic across multiple servers, ensuring high availability and reliability.
Conclusion:
As we wrap up our comprehensive guide on installing Linux on your server, it's time to reflect on the journey you've undertaken and explore what comes next. In this final section, we'll summarize the key takeaways, celebrate your accomplishments, and encourage you to continue your exploration of the server administration world.
A. Recap of Key Takeaways
Selecting the Right OS: Remember the importance of choosing the right operating system for your server, with Linux offering reliability, security, and flexibility.
Preparation is Key: Understand that thorough preparation, including hardware compatibility checks and backups, is the foundation for a successful installation.
Choosing a Distribution: Recognize the significance of selecting the appropriate Linux distribution for your server's needs and preferences.
Installation Process: Celebrate your successful completion of the installation process, ensuring that Linux is correctly configured and ready for action.
Post-Installation Configuration: Acknowledge the importance of post-installation tasks, which include updating, securing, and customizing your server.
Troubleshooting Skills: Highlight the value of troubleshooting skills for addressing common installation issues and ensuring a smooth setup.
Server Configuration: Appreciate the opportunities for optimizing your server through additional applications, virtualization, monitoring, and data management.
B. Continuing the Journey
Ongoing Learning: Recognize that server administration is an ever-evolving field. Stay curious and committed to ongoing learning, keeping up with the latest updates, security practices, and technologies.
Community Engagement: Engage with the vibrant server administration community. Participate in forums, online communities, and social media to share your experiences and seek help when needed.
Exploration: Encourage readers to explore new server applications, experiment with different technologies, and adapt their server to evolving needs.
Certifications and Courses: Consider pursuing server administration certifications and online courses to deepen your knowledge and expertise.
Professional Growth: Highlight the potential for professional growth, as server administration skills are in demand in various industries.
C. Your Digital Journey Continues
Your journey into the world of server administration has only just begun. By installing Linux on your server, you've gained the power to create, host, and manage a wide range of applications and services. Your server can be the foundation for websites, databases, and much more. It can enhance security, reliability, and efficiency in your digital life.
As you continue your server administration adventure, remember that the Linux and open-source communities are here to support you. Whether you're building a personal website, hosting a game server, or managing critical business applications, your server can be a gateway to exciting possibilities and a rewarding digital experience.
Congratulations on your achievements, and best of luck as you embark on the next steps in your server administration journey. Your server is ready and waiting to serve your ambitions and creative endeavors.